萬盛學電腦網 >> 圖文處理 >> Photoshop教程 >> ps濾鏡教程 >> PS濾鏡制作逼真皮革效果
PS濾鏡制作逼真皮革效果
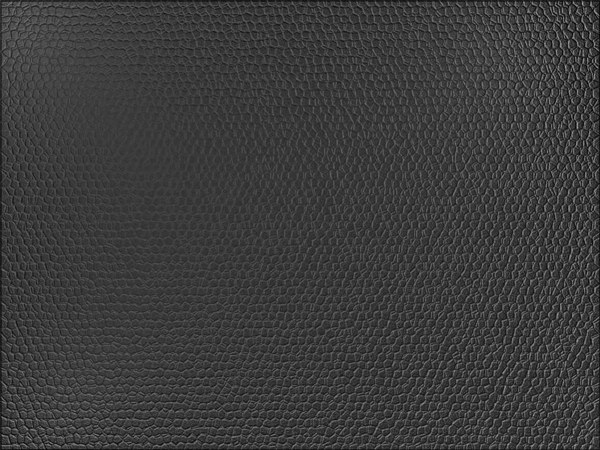
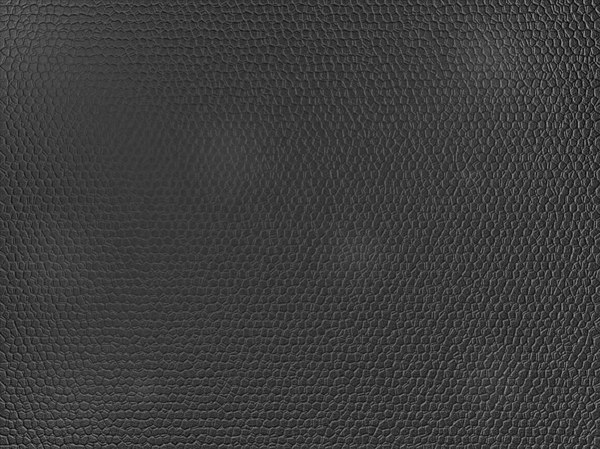
教程向三聯的朋友們介紹如何利用PS濾鏡制作逼真皮革效果,教程是國外翻譯的,轉發過來分享給大家,教程難度不算大,適合初中級PS學習者學習,我們先來看下最終效果圖。

下面是具體的制作過程:
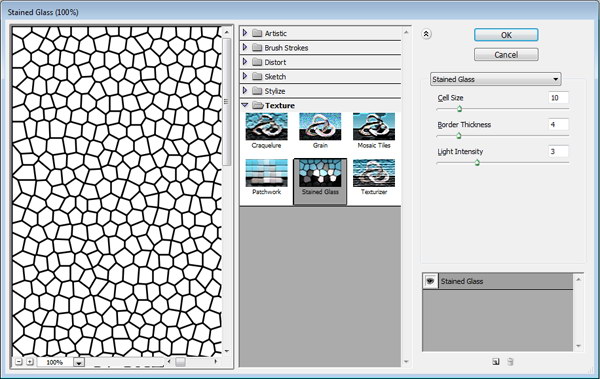
Step 1Create a new file with a white background. Set the foreground and background color to black and white by pressing D. Click Filter > Texture > Stained Glass.第一步:新建一個白色背景的圖層,按D設置前景白色與背景黑色,點擊濾鏡--紋理--染色玻璃
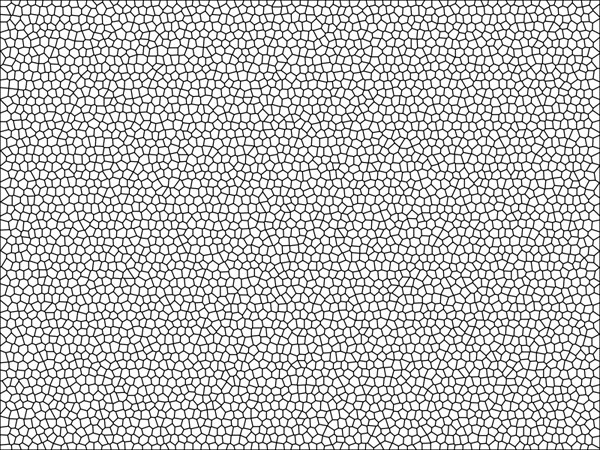
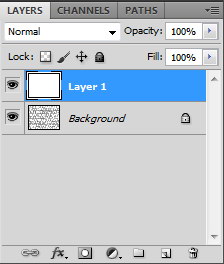
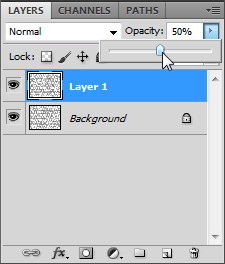
Step 2Create new layer and fill it with white. Change its opacity to 50%. Repeat previous filter by pressing Cmd + F. If you want tweak the setting use Cmd + Alt + F.第二步:再新建一個白色圖層,透明度改為50%,CTRL+F重復上次濾鏡。如果想修改上次濾鏡設置,按ctrl+alt+f.(說明一下,我用的是 PC,所以翻譯是按我用的來的。Cmd是蘋果機上面的)

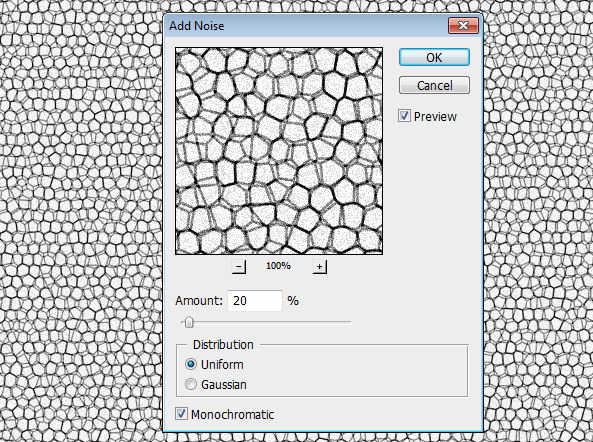
Step 3Press Cmd + E to merge both layers. Click Filter > Noise > Add Noise.第三步:合並這兩個圖層(ctrl+e),點擊濾鏡--雜色--添加雜質
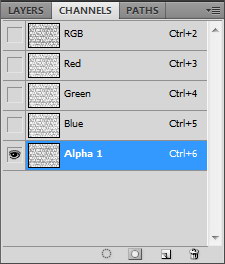
Step 4Press Cmd + A then Cmd + C to copy all to clipboard. Open Channels panel and create new channel. Then Paste (Cmd + V).第四步:ctrl+a 全選並復制。打開通道面板新建一個通道。把剛才復制的粘貼上去
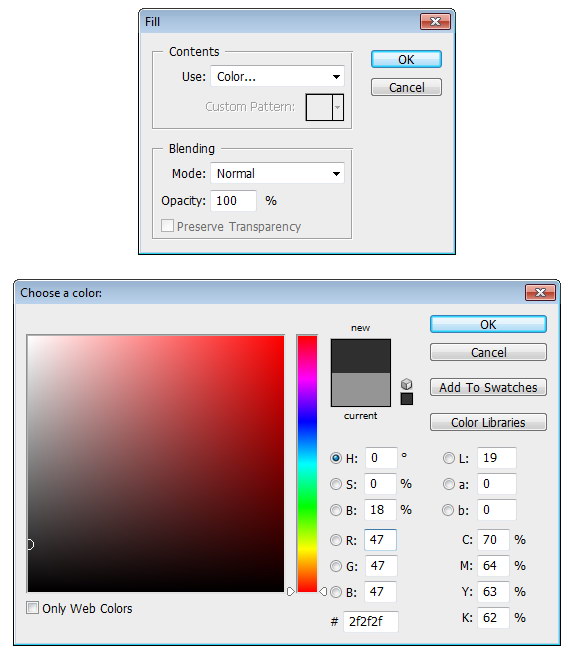
Step 5Click RGB channel to return to Background layer. Click Edit > Fill, choose Use: Color and pick your color. You can use any color you want, just make sure it’s dark enough for the next filter.第五步:點擊RGB通道返回到圖層,點擊編輯--填充 出現的對話框如下:Use:color,然後選擇你喜歡的色,但是為了下次濾鏡要確保它的暗度(?)足夠。
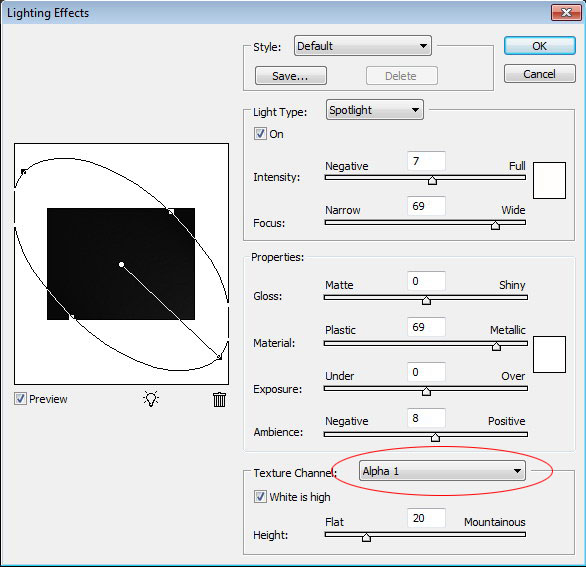
Step 6Click Filter > Render > Light Effects. In Texture Channel choose Alpha 1.第六步:濾鏡--渲染--光照效果。下面的紋理通選擇Alpha 1
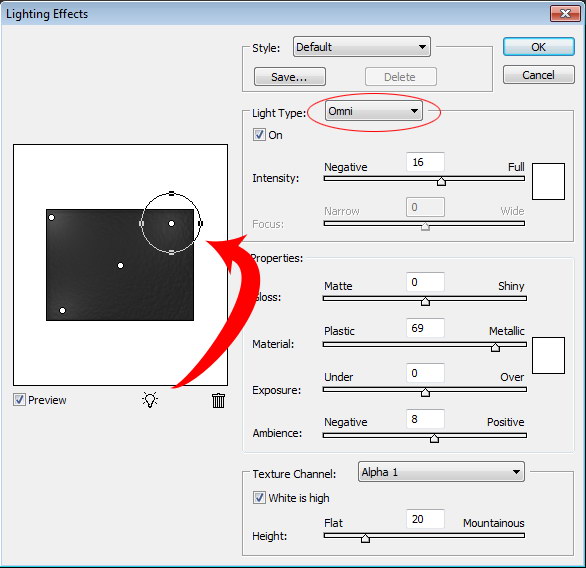
Step 7The default light is too dark. You need to add more light sources by dragging the lamp icon to the preview box. Set its type to Omni.第七步:默認燈光太暗了,需要添加更多的光源,將下面燈泡樣的圖案拖到預覽圖上。設置全光源。
Step 8Click OK and the result should look something like below.第八步:點擊OK。最後的結果應該是看起來有些東西在上面。(純個人理解)
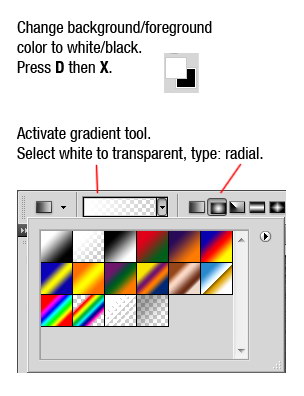
Step 9Change the background and foreground color to white and black by pressing D then X. Activate the Gradient Tool, choose radial with white to transparent. Create a new layer and draw a gradient.第九步:先D後X,設置前景為白色,背景為黑色。選擇漸變工具,由白色到透明的徑向。新建一個圖層,畫一些漸變。
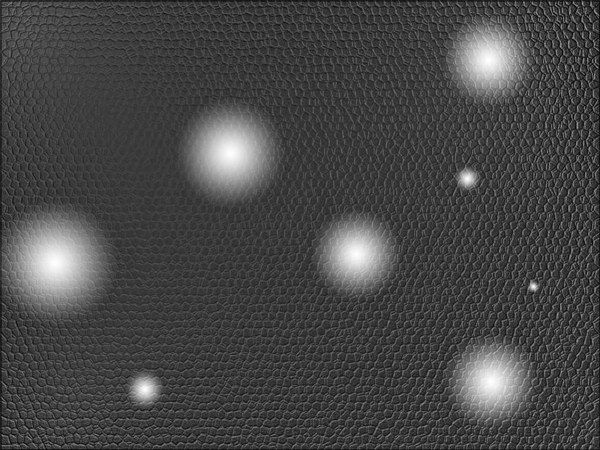
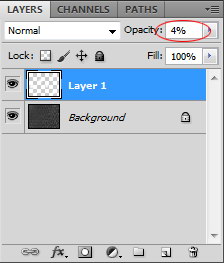
Step 10Change opacity to 4%. This will add subtle lighting to the leather.第十步:將透明度設為4%,這是為了給皮革制造少許光。
Step 11The Lighting Effects filter will add a small border to the image (just a few pixels). To remove it, click Image > Canvas Size and reduce the size of the image.第十一步:圖像邊緣也會有少許的光照效果,為了去掉它,單擊--圖像--畫布大小,縮小畫布尺寸(溫馨提示,下面的相對(Relative) 一字要勾上)

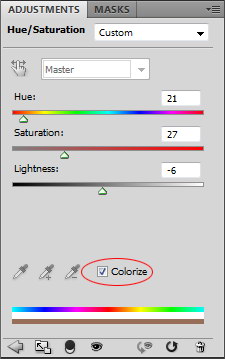
Step 12 (Optional)You can change the color by adding an adjustment layer Hue/Saturation. Check colorize and move sliders until you satisfied with the result.第十二步:可以用色相/飽和度來調色。勾上 著色,移動滑塊直到你滿意。
Final ImageThat’s it. I hope you like the final result and have learned some new techniques from this short quick tip tutorial.最終效果:當當當。。。就是它了,我希望你喜歡並且從這個教程中學習到一些新的技巧。(嘿嘿。。。確實學到了,這句話也是俺的心聲,希望對你們有幫助)