萬盛學電腦網 >> 圖文處理 >> Photoshop教程 >> ps圖片處理 >> PS打造美女抽象照片教程
PS打造美女抽象照片教程
這是一個中等水平的教程,所以有些步驟會有點難,但是不妨來試一試吧!
“注意:本教程使用PS CS6,所以有些截圖看起來跟舊版的不太一樣,而且有些筆刷是CS6才有的。”
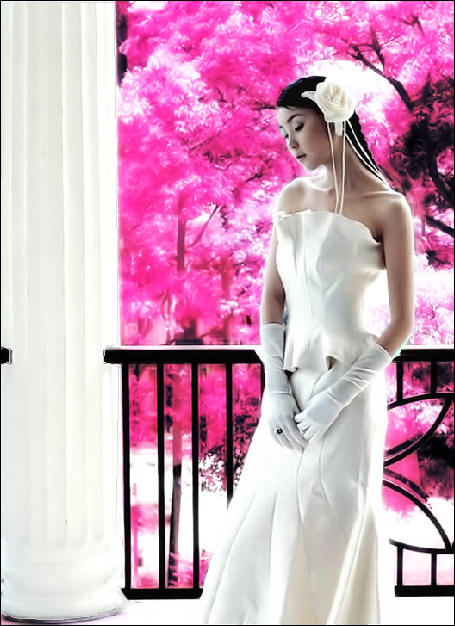
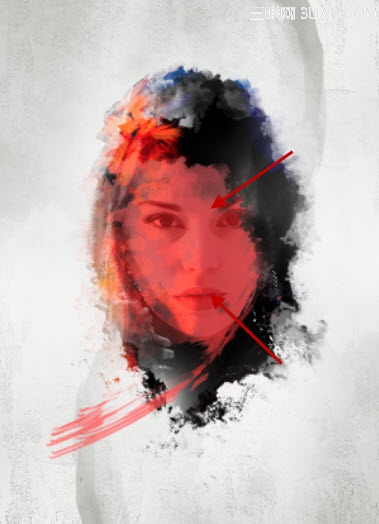
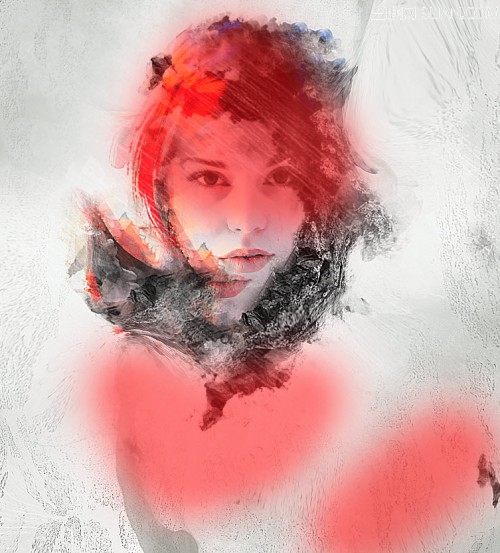
效果預覽:

你需要准備:
一張女孩照片
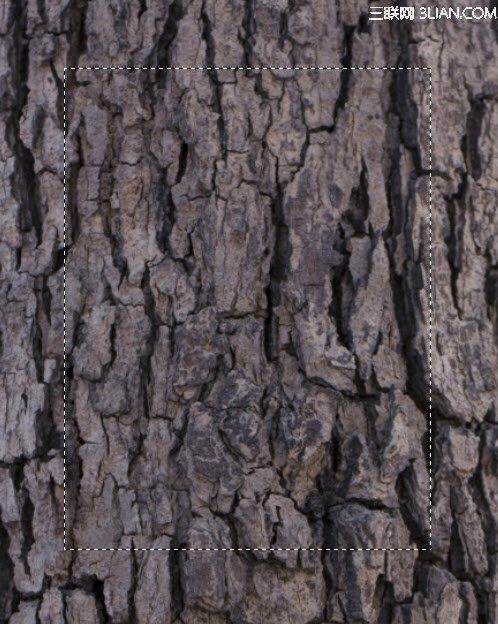
樹皮紋理
噴濺筆刷
Step 1新建一個文件,大小為800px*1136px,背景色為#cccec9.
我們會在背景上加點紋理——載入樹皮紋理,用矩形選框工具圈出一個選區,如下圖
將選區復制粘貼到文件裡,調整它的大小來適合畫布。按以下方式調整:
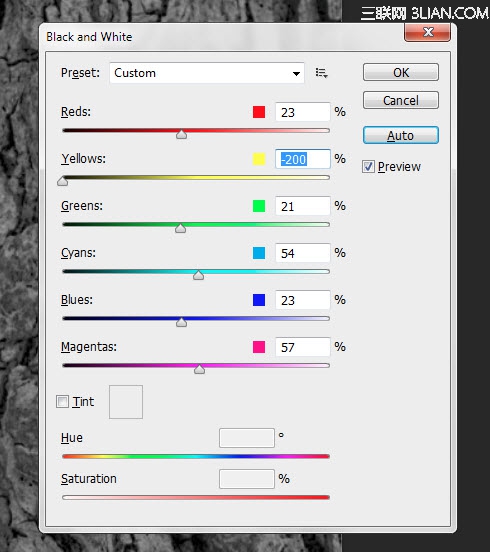
黑白:
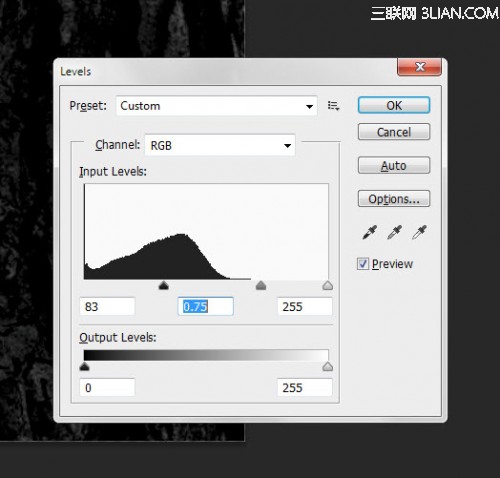
色階:
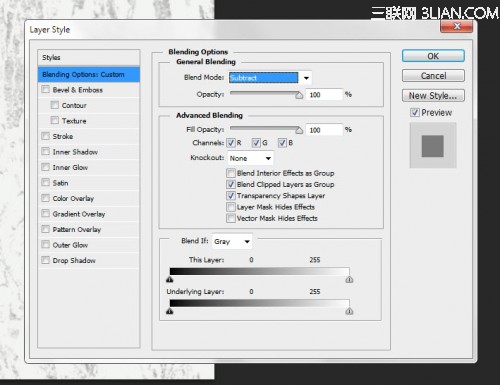
將混合模式設置為“減去”(不是CS6的可以用“疊加”代替)
在畫布中央用一個白色的軟筆刷加個高光
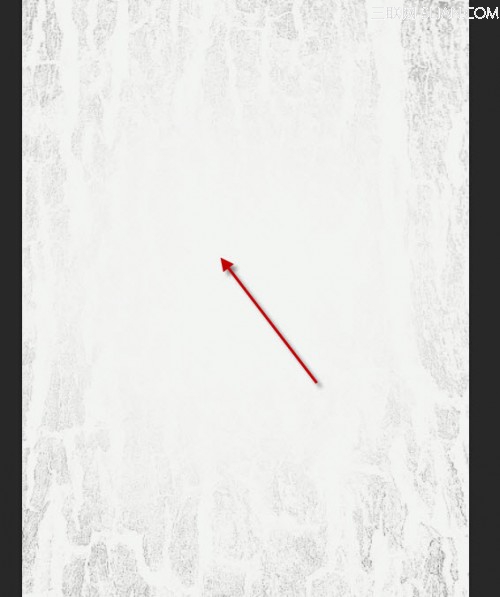
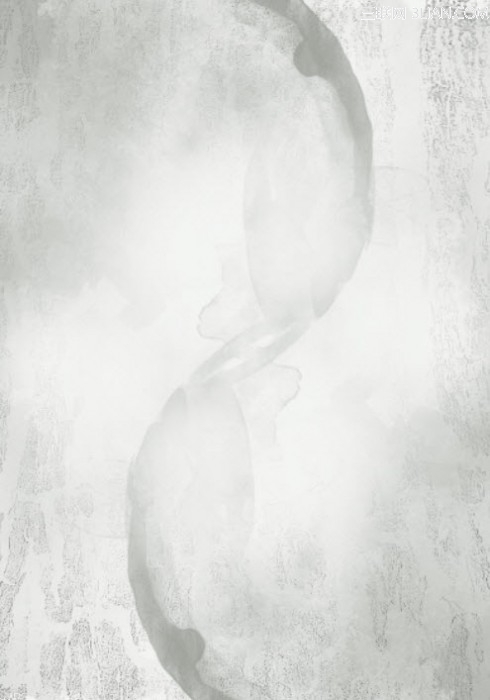
然後新建一個圖層,用一些噴濺筆刷在上面隨便畫幾筆——我畫出來的效果是這樣的:
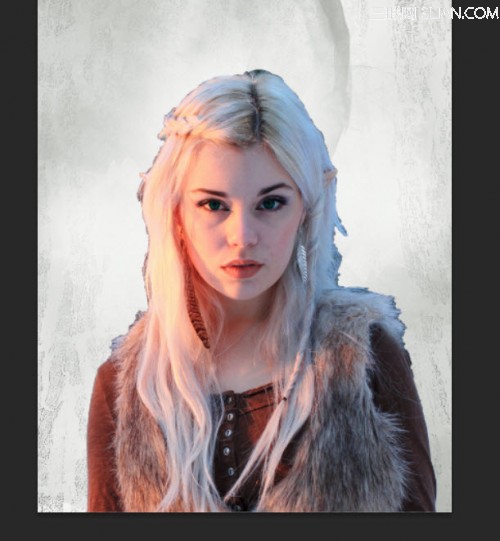
Step 2在PS裡打開女孩圖片,摳出女孩的形象然後粘貼到現在這個文件裡:
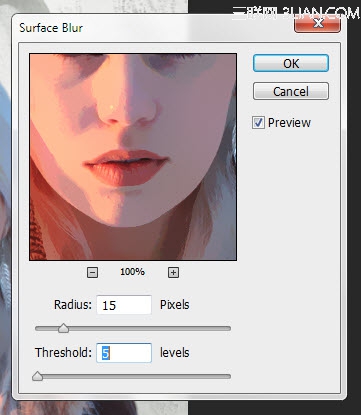
對這個圖層使用“表面模糊”,參數如下:
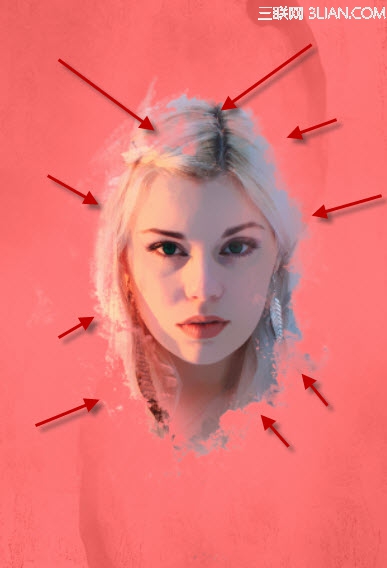
用任意的噴濺筆刷作為橡皮,將女孩圖片的邊緣像下圖這樣塗掉(注意圖的時候調整筆刷大小)
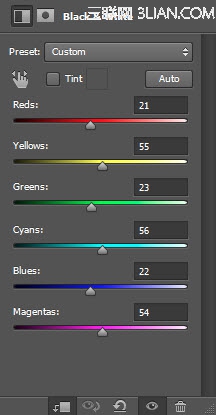
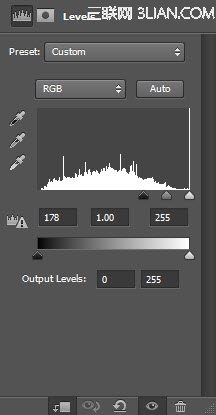
將三個調整圖層作為剪貼蒙版加在女孩圖層上::
黑白
圖層蒙版在黑白調整層上:

色階
圖層蒙版在色階調整層上:
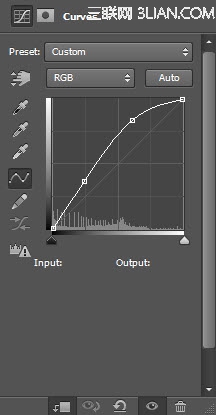
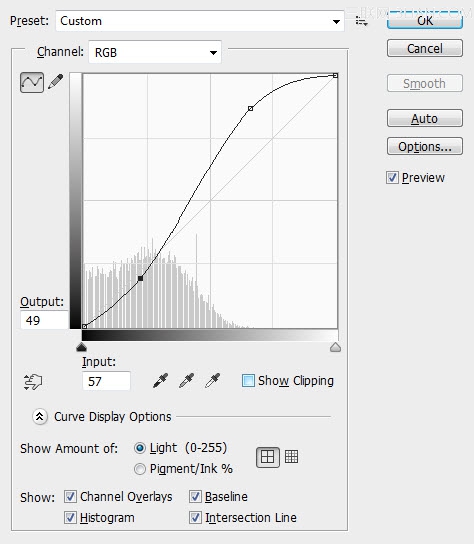
曲線:
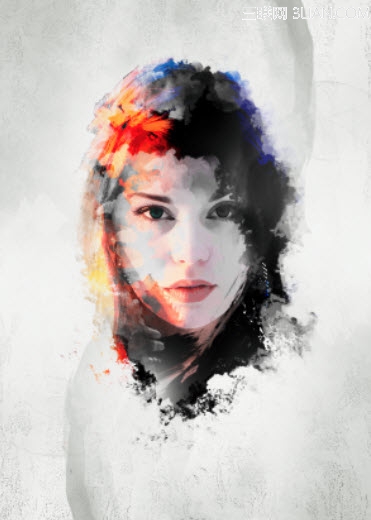
目前的效果:
Step 3我們要在臉周圍加一些樹皮紋理——用快速選擇工具在樹皮圖片上選取一塊,然後復制粘貼到這個文件裡,如下圖:
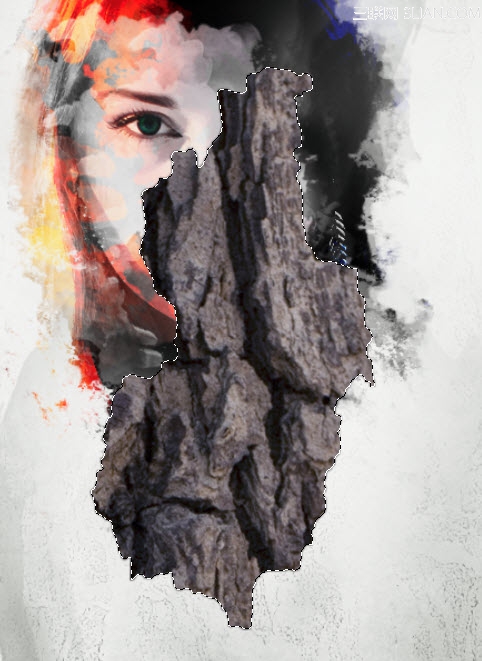
對這個新圖層做變換,如下圖:
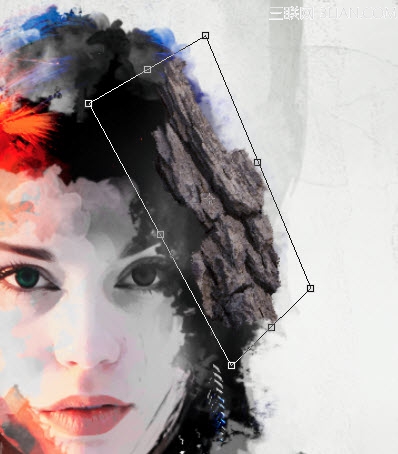
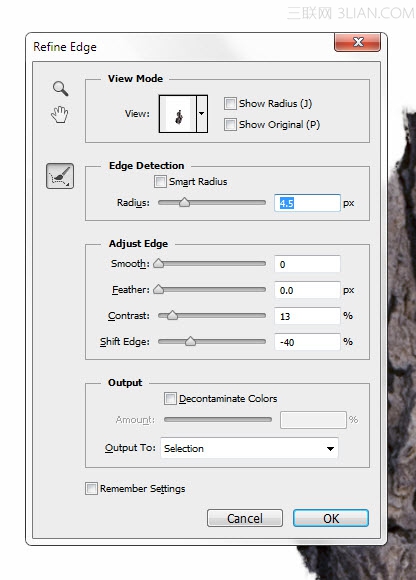
選擇這個新圖層,使用調整邊緣工具,參數如下(這樣使這個樹皮圖層有粗略的邊緣)
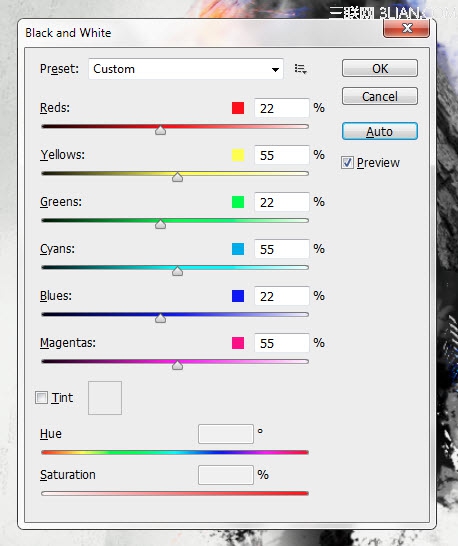
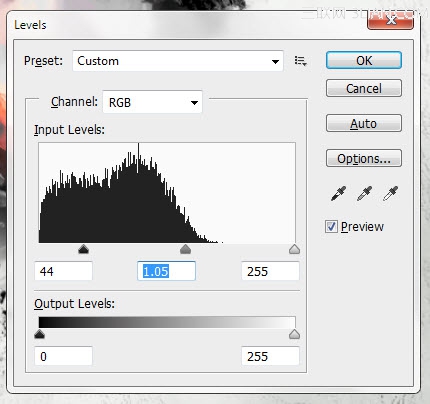
對樹皮圖層做如下三種調整:
黑白:
色階:
曲線:
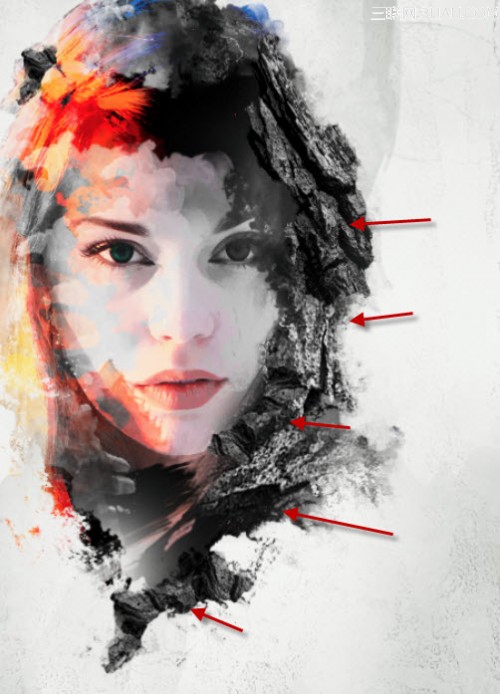
然後我們可以復制多個樹皮圖層,並且將他們如下圖所示放置在臉周圍:
Step 4我們已經完成了紋理和圖畫的部分。讓我們把圖像合並圖層並復制背景圖層,使用仿制圖章工具:
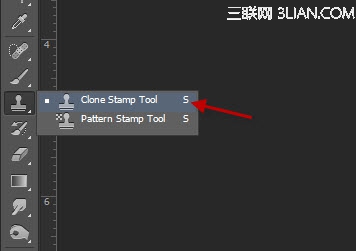
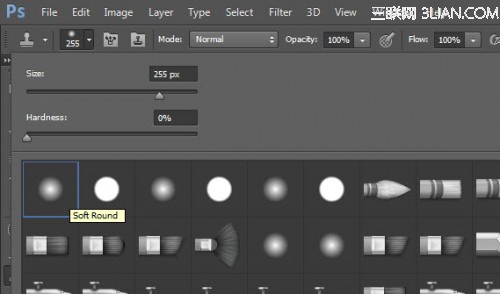
將仿制圖章工具的筆刷設置為柔邊圓
將下圖所示的部分設為仿制源,然後將女孩臉的周圍畫成如下圖的樣子:
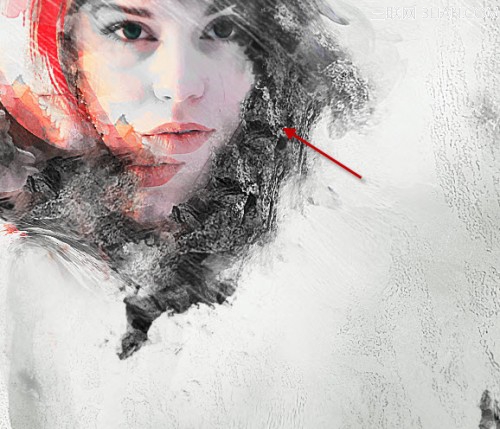
對這個新圖層使用如下圖層蒙版來隱藏一些部分:
- 上一頁:PS制作飄渺煙霧女孩
- 下一頁:PS精修美女照片