萬盛學電腦網 >> 圖文處理 >> 3DSMAX教程 >> 3DSMAX書房材質貼圖教程
3DSMAX書房材質貼圖教程

INTRODUCTION | 介紹
Here will explain very simple practice interior render with HDRI lighting
· 關於室內HDRI真實燈光的一篇簡單教程
PREPARATION | 預置
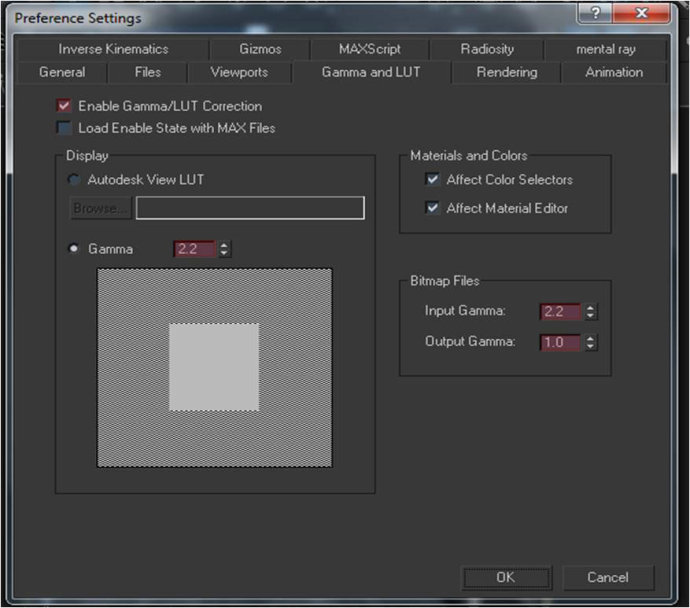
For all my projects I set my gamma for LWWF(Linear Workflow) to get a correct brightness and because I want to do post production on my image.
· 個人的一個作圖習慣 - 把gamma設置成LWWF(Linear Workflow.線性流程)以獲得最真實的光感,減少後期工作。
MODELING | 建模
In this scene I used ready made models for accessaries, so I just modeled the wall, floor, window object using basic edit poly. And I created a simple decorative cloth model in Clo3d 2011.
· 場景裡基本使用的都是外部引入的家具擺設模型,只需要建門窗地板,然後要提到的是用Clo3d 2011(三維服裝軟件)做了個簡單的衣服模型。
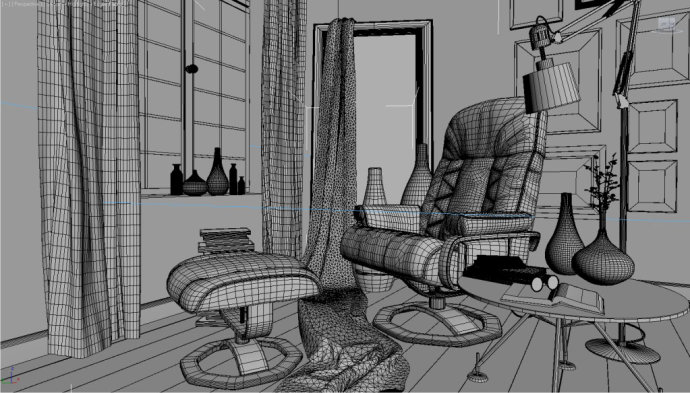
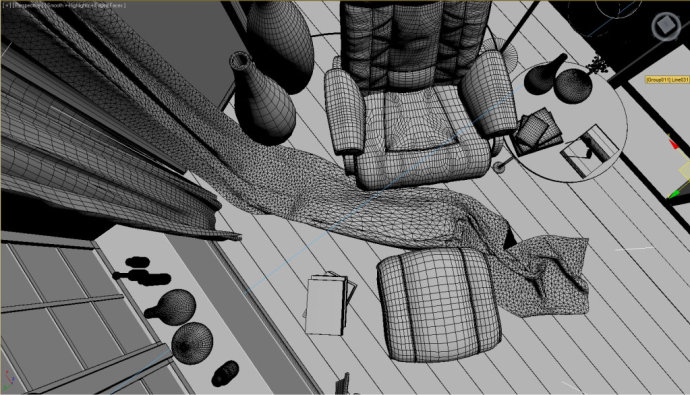
Fix model for camera view.
· 視角如下
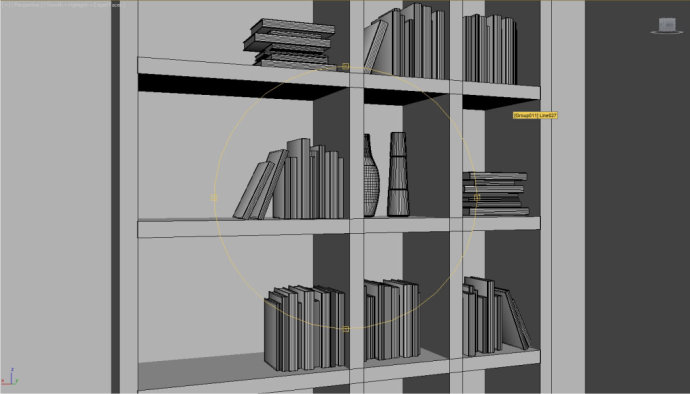
Book case for reflection on the mirror.
· 鏡子反射用到的書櫃
Cloth made in clo3d 2011 and the floor made only from a simple box.
· clo3d 2011做的衣服模型,地板只是個簡單的盒子
LIGHTING | 打光
As I said before, in this scene I am using HDRI lighting with Vraylight Dome+HDRI map. You can see my method in the image below.
· 場景用到的是HDRI 燈光和Vray燈光頂(Vraylight Dome)+ HDRI貼圖,如下圖所示。
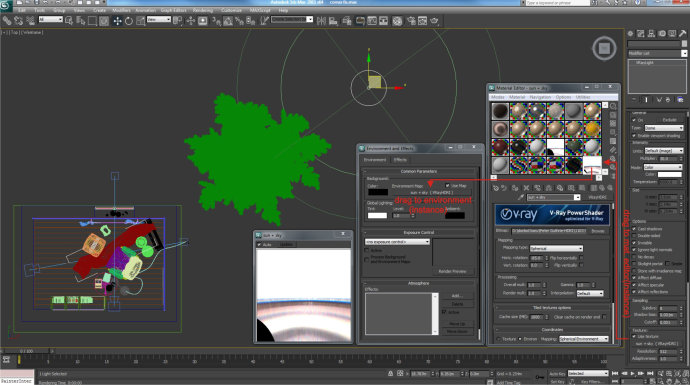
You only have to set the mapping type to spherical, horiz,. rotation to control the sum beam direction, and gamma to set a correct GI, sun and strong shadow shape.
· 只需把設貼圖設置成球形水平旋轉來控制光束的大方向,把gamma設置成正確的GI,太陽光和重陰影形狀。
This is the simulation using different gamma values:
· 下面是不同gamma值下的效果。
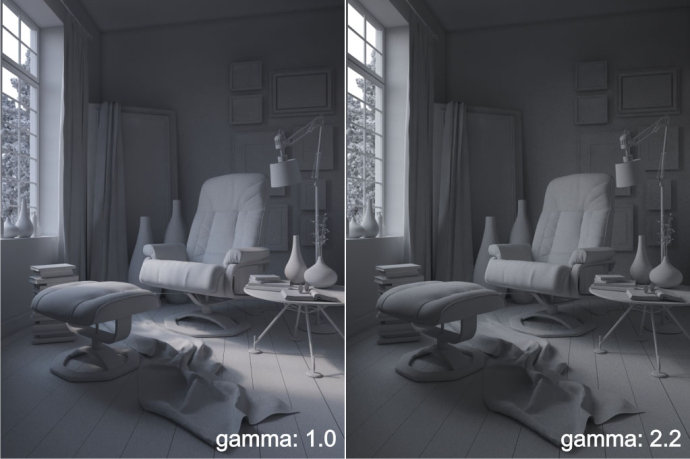
Increased gamma can make a soft shadow effect and weak sun lighting. Decreased gamma can make the shadow look sharpen and strong sun lighting.
· 較高的gamma值能達到柔和的光影效果,而較低的光影對比更強烈。
Of course it is not a fixed setting. Different scenes require you to set different gamma values and also different horiz. rotation to get the correct lighting in your scene.
· 當然這不是唯一的參數設置,對於不同場景要靈活運用不同的gamma值和不同的水平旋轉來達到最佳的光影效果。
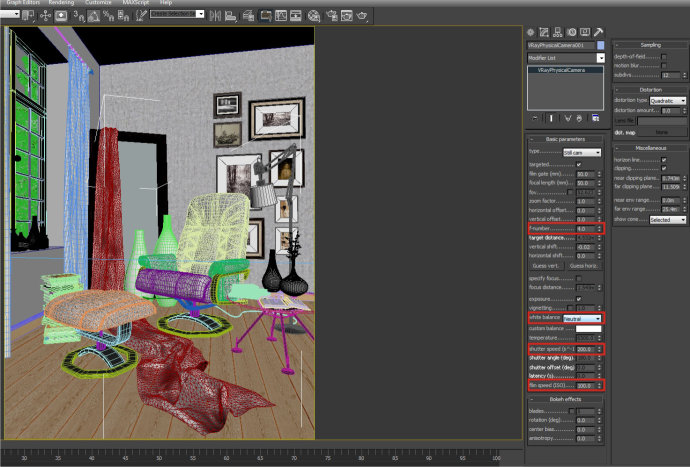
CAMERA SETTINGS | 相機設定
Just simple setting for my vrayphysical camera.
· 以下是vray物理相機的簡單參數
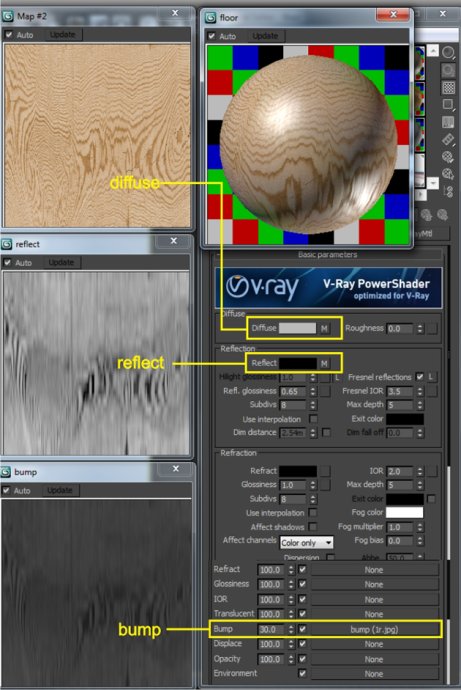
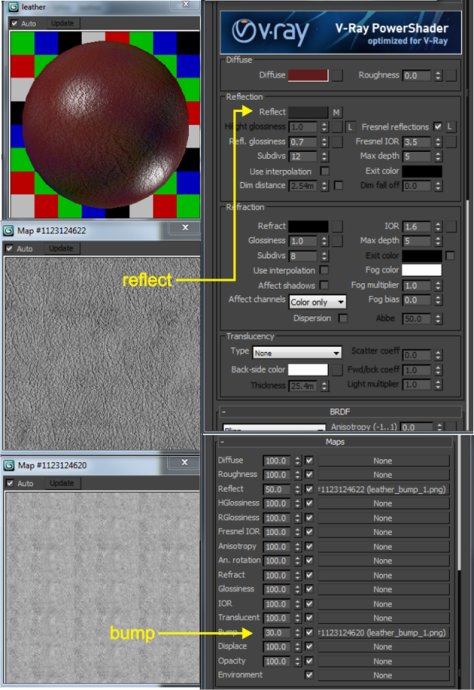
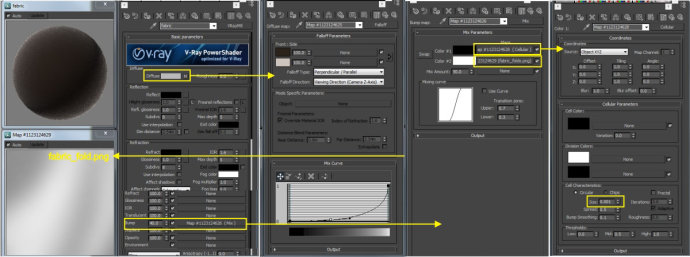
MATERIAL AND TEXTURING
There are a lot of advanced materials that I use in the simple scene. I only use standard method color selector to set the diffuse and reflect properties.
· 在這個簡單的場景裡有很多高級材質設置,在反射上只用到了基本的方法,沒什麼特別的。
Wood floor · 地板
Red Leather · 紅皮革
Fabric · 布料
RENDER PRESET | 渲染預設
Here are my render preset settings:
· 以下是這裡用到的渲染預設

And this is the final raw rendered image:
· 下面是無後期的渲染圖
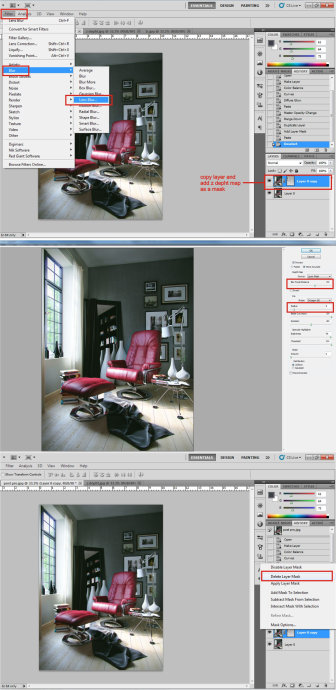
Z-depth map image · 深度圖
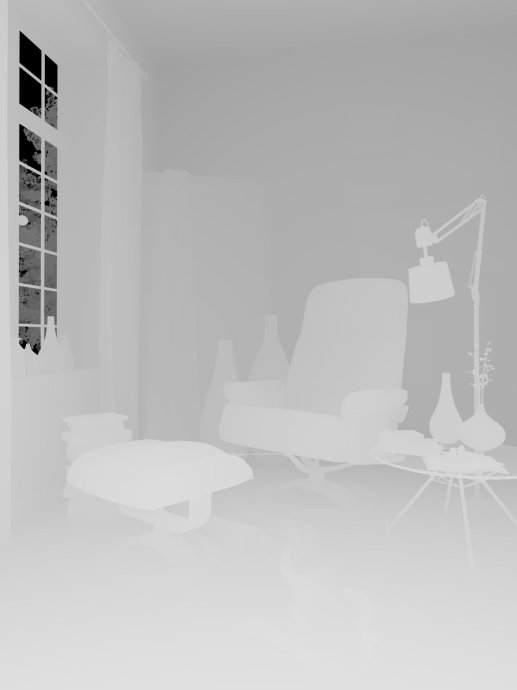
Reflection map image · 反射圖

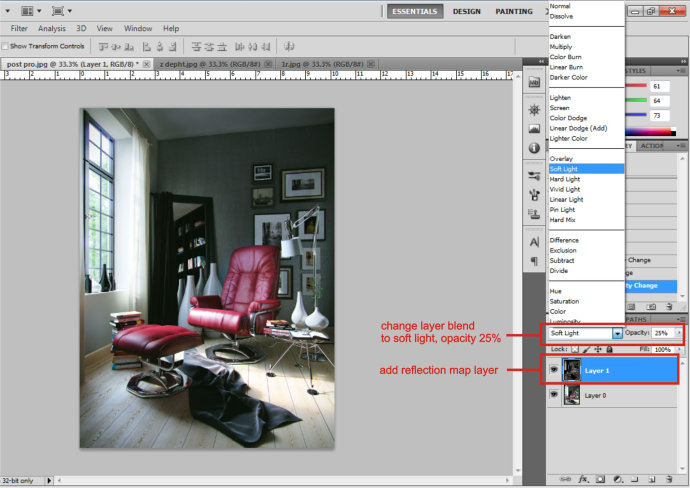
POST PRODUCTION | 後期
In this process I only use a simple technique for post production. I like natural colors in my rendered image.
· 這一步用了個簡單的後期技巧,我喜歡做很自然的顏色。
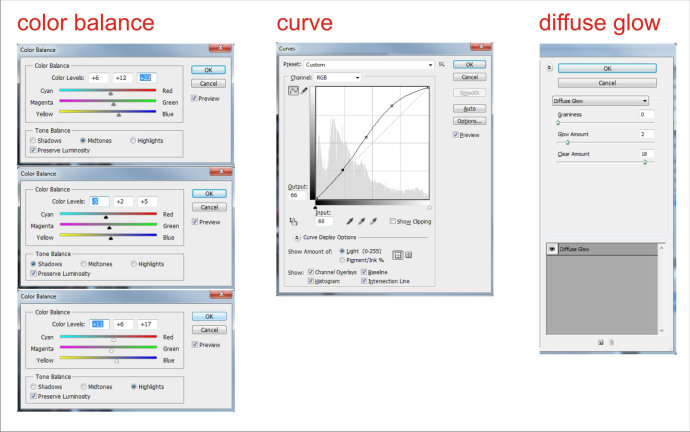
1. Color correction using color balance and curves and then add little bit of diffuse glow.
· 用色彩平衡和曲線來做顏色校正,加入了一點發散的光暈。
2. Blend with a reflection map
· 與反射貼圖混合
3. Add a Depth Of Filed effect using a z-depth map
· 用深度圖增強效果
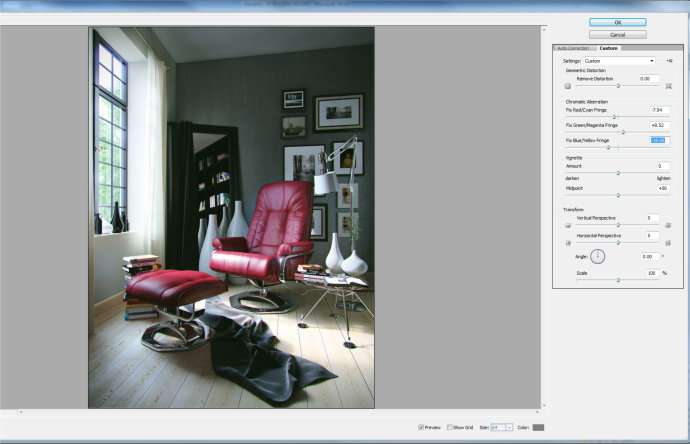
4. Chromatic Aberration · 色彩調節
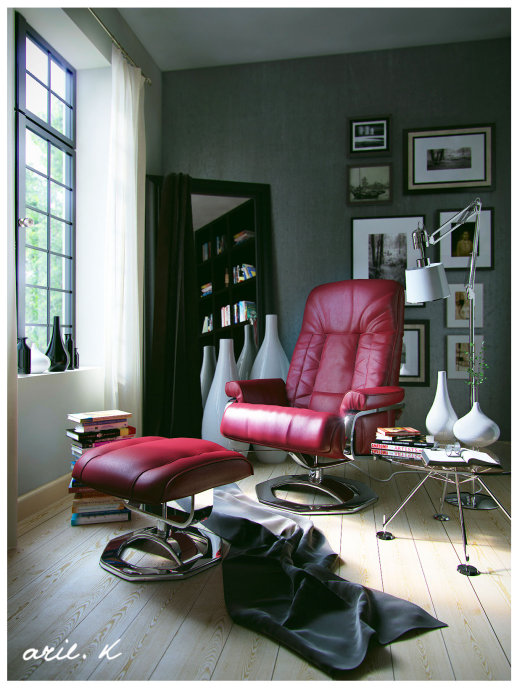
FINAL RENDER RESULT | 最終圖
That's all of the post production and this is the final result:
- 上一頁:3DSMAX實用粒子介紹
- 下一頁:3DsMAX制作镂空三維字體